Generating Images from Audio with Machine Learning
Quick Summary
In this article, I’ll show you how to create amazing images from audio using the magic of Machine Learning and the Transformers models. I’ll explain each step clearly, uncover the secrets behind Whisper, and highlight the incredible abilities of Hugging Face models. By the end, you’ll know how to transform audio into stunning images with these powerful tools.
Introduction
Have you ever listened to someone describe a scene in a speech or audiobook and pictured it in your head? Using AI, we can automatically turn spoken words into images by transcribing audio and generating pictures.
In this guide, I will demonstrate how to generate images from audio using pre-trained models. The key steps are:
- Transcribing audio to text using the Whisper speech recognition model
- Summarizing the text transcripts using a transformer model
- Generating images from the text summaries with Stable Diffusion
I will walk through Python code examples for each stage of this audio-to-image tutorial. By the end, you will understand how to combine speech recognition, text summarization, and text-to-image generation models to produce relevant images from audio input.
Whisper and Hugging Face Models: A Deep Dive
Whisper: The Automatic Speech Recognition System
Our journey into audio-to-image transformation begins with Whisper, an automatic speech recognition (ASR) system trained on 680,000 hours of multilingual and multitask supervised data collected from the web. Whisper ASR plays a pivotal role in our project. It’s the initial step where audio gets transformed into text. This is crucial because we can’t directly turn sound waves into images; we need an intermediary, and Whisper fulfills that role exceptionally well. It ensures that the spoken words in the audio are accurately represented in written form.

Pre-Trained Models from Hugging Face
Hugging Face is a hub for developers. It’s packed with pre-trained models that excel in various language tasks. Whether you need to understand text, translate languages, summarize paragraphs, or generate images, Hugging Face has your back.
In our journey to turn audio into images, we picked two remarkable models from the Hugging Face model hub:
- T5- Text-to-Text-Transformer-Transformer: This model takes a unique approach by framing all NLP tasks into a unified text-to-text format. In this format, both the input and output are always text strings. This versatility allows one T5 model to handle multiple tasks effectively. Imagine it as a jack of all NLP trades! You can dive deeper into T5 in this Google Research blog and access it on the hub here.

- Stable Diffusion: Stable Diffusion is a text-to-image AI model created by CompVis, Stability AI, and LAION using latent diffusion, an efficient image generation technique proposed in the paper “High-Resolution Image Synthesis with Latent Diffusion Models.”
The Stable Diffusion model uses an encoder-decoder architecture consisting of a UNet decoder and CLIP text encoder. It is trained on LAION-5B data to generate 512×512 images matching text prompts on consumer GPUs.

Innovations like latent diffusion and CLIP make Stable Diffusion an accessible, state-of-the-art text-to-image synthesis model. You can learn more about the model here.
Now, we’re going under the hood. We’ll explore the code that drives our audio-to-image magic. But don’t worry, I’ll explain it step by step.
Prerequisites
Before we start our audio-to-image adventure, let’s make sure we have a few things in place:
- Python Knowledge: You should know a bit about Python, the programming language we’ll use. Don’t worry; you don’t need to be a Python pro, just familiar with the basics.
- Some NLP Understanding: We’ll deal with text and language processing, so having a basic idea of NLP concepts, like how we handle words and sentences, will be helpful.
- Curiosity: Most importantly, bring your curiosity and interest. This project is all about exploring cool tech stuff and being creative. So, let’s get started!
Model Setup and Code Walkthrough
In this section, we’ll get our tools ready. We’ll use a Colab notebook (the free version is enough), the powerful Whisper ASR system, and some pre-trained models.
Installing the Libraries
We first need to install some essential Python libraries to get started with audio-to-image generation. These will provide the abilities our code needs.
The core libraries we’ll install are:
- PyTorch for deep learning capabilities
- Transformers for natural language processing models
- Diffusers for diffusion models like Stable Diffusion
You can install these essential libraries using pip:
!pip install torch transformers
And for the Diffusers:
!pip install --upgrade diffusers[torch]
With the essential libraries installed, we can now import them to start using their capabilities:
from transformers import pipeline
from diffusers import StableDiffusionPipeline
import torch
import os
from IPython.display import Image, display
These libraries will enable us to perform audio transcription, text summarization, and image generation as part of our project. If you’re all set, we can now dive into the next steps of the process.
Loading the Models
Let’s set up the models for handling audio, text, and images.
First, we need a way to convert spoken audio into text. We will use Whisper, an automatic speech recognition model trained by OpenAI. Rather than loading the model directly, we can use the pipeline function to load Whisper like this:
# Load the Whisper model using a pipeline
whisper_pipeline = pipeline("automatic-speech-recognition", model="openai/whisper-base")
Whisper has five different model sizes, each offering varying trade-offs between speed and accuracy. We used the “base”.en model, optimized for English-only applications. It performs better, especially for the base and tiny model sizes.
Next, we need to load a model to generate images from text. For this, we will use Stable Diffusion, a text-to-image diffusion model.
We load the Stable Diffusion model like this:
model_id = "runwayml/stable-diffusion-v1-5"
text_to_image_pipe = StableDiffusionPipeline.from_pretrained(model_id, torch_dtype=torch.float16)
text_to_image_pipe = text_to_image_pipe.to("cuda")
Calling StableDiffusionPipeline.from_pretrained(model_id) initializes the model with its architecture and configuration. Now, the text-to-image generation capabilities are ready to use.
In addition to transcription and image generation, we want to summarize long texts. For this purpose, we load the T5-small model:
summarization_pipeline = pipeline("summarization", model="t5-small", tokenizer="t5-small")
At this point, we have set up Whisper, Stable Diffusion, and now T5-small. Our pipelines for speech-to-text, text-to-image, and text summarization are initialized and ready for us to start feeding in audio.
Transcribing Audio to Text
To transcribe audio into text, we’ll use this Python function to handle the speech-to-text conversion:
# Function to transcribe audio
def transcribe_audio(audio_path):
    # Transcribe the audio using the Whisper pipeline
    transcribed_text = whisper_pipeline(audio_path)
    return transcribed_text
The transcribe_audio function accepts an audio file path and handles the speech-to-text transcription process. Under the hood, it passes the audio file to the Whisper automatic speech recognition model we loaded earlier using the pipeline. Whisper analyzes the audio, detects speech, and transcribes the spoken words into text. This text transcript is then returned by the transcribe_audio function as the output.
Let’s look at an example of using transcribe_audio:
# Example usage
audio_path = "/content/audio.wav"  # Replace with your audio file path
transcribed_text = transcribe_audio(audio_path)
print("Transcribed Text:", transcribed_text)
The code above shows how we can call transcribe_audio, passing our audio file path to get back the text transcript. This demonstrates the simplicity of using the function to transcribe any audio file into text.
Output:
Transcribed Text: The stale smell of old beer lingers. It takes heat to bring out the odor. A cold dip restores health and zest. A salt pickle tastes fine with ham. Tacos al pastor are my favorite. A zestful food is the hot cross bun.
Summarizing the Transcript
After transcribing the audio, the resulting text transcript can often be lengthy. For generating images, long descriptions are hard to interpret.
To address this, creating a summary can concisely capture the essence of the transcript.
We’ll load the T5 text summarization model and create a function to generate summaries:
# Function to summarize text
def summarize_text(text):
    # Adjust max_length based on input text length
    max_length = min(len(text) + 10, 15)  # Add a buffer of 10 tokens and cap at 15
    summary = summarization_pipeline(text, max_length=max_length, min_length=5, do_sample=False)[0]['summary_text']
    return summary
summarized_text = summarize_text(transcribed_text)
print("Summarized Text:", summarized_text)
This function uses a library that streamlines the summarization process. We’ve set it up to adjust the maximum length based on the input text’s length, ensuring an effective summary. Finally, we print the summarized text.
Synthesizing Images from Text
With the summarized text, the next step is to transform it into cool visual imagery. This is where our project reaches its artistic peak. To achieve this, we utilize yet another piece of Python code.
# Generate image from summarized text
generated_image = text_to_image_pipe(summarized_text).images[0]
# Display or save the generated image as needed
generated_image.save("generated_image.png")
#Display the generated image
display(generated_image)
In this code, we take the summarized text as input; using an innovative model, the function generates an image corresponding to the text’s content. Once the image is generated, we can display it or save it as a file for later use. The result is a captivating visual representation of the spoken words, ready to be admired or shared.
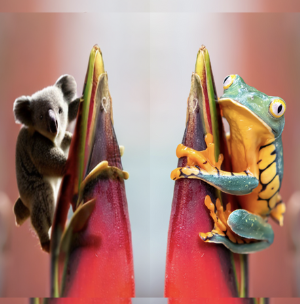
Here is the output:

What’s Next?
Now that you’ve seen how we transform audio into amazing images, how about taking it a step further? Imagine creating your own app where you and others can turn spoken words into captivating visuals.
And here’s the best part: you don’t need to be a coding expert. User-friendly tools like Gradio and Streamlit are fantastic choices for building your app. So, what are you waiting for? Dive into this creative journey and let your imagination take the lead with audio and machine learning!
Related Articles