Exploring the Power of Llama 2 Using Streamlit

Introduction
2023 has been significant for large language models. Many advancements have been made since ChatGPT, including open-source and licensed models. The recent release of Llama 2 by Meta and Microsoft has taken the AI world by storm. An open-source model that is just as good as GPT 3.5 or even GPT 4? We’re yet to know.
In this article, we will explore the power of Llama 2 using Streamlit.
Understanding Llama v2
Llama 2, a natural language processing library from Meta, consists of pre-trained and fine-tuned large language models (LLMs) whose scale ranges from 7 billion to 70 billion parameters. The Llama 2-Chat is optimized to support human conversation use cases. It is a suitable alternative for closed models since it outperforms the open-source chat models on most tested benchmarks. We’ll explore how Streamlit provides an intuitive user interface, and Llama v2 empowers the chatbot with sophisticated language understanding capabilities, resulting in a powerful conversational AI application.
Setting Up Streamlit
The first step to setting up a Streamlit app is to create a virtual environment.
We will use the Pipenv library as follows:
pipenv shell
Next, we will install the necessary libraries to build our chatbot.
pipenv install streamlit replicate
Streamlit is an open-source Python framework used to deploy data science apps.
Replicate is a cloud platform that hosts large machine learning models for easy deployment.
Accessing Llama 2 API Token
Before you access Replicate’s token key, you must register an account on Replicate.
Note: You must have a GitHub account to sign in to Replicate.
Search for Llama 2 chat on the Replicate dashboard.
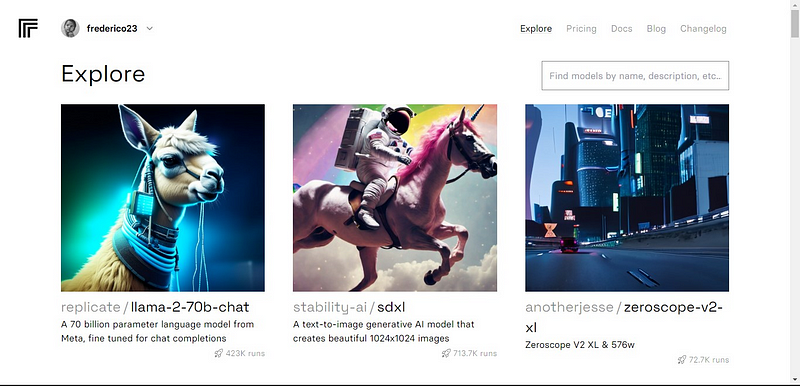
Click on the llama-2–70b-chat model to view the Llama 2 API endpoints.
Click on the API button on the llama-2–70b-chat model’s navbar.
Next, on the right side of the page, click on the Python button to access the API token for Python Applications.
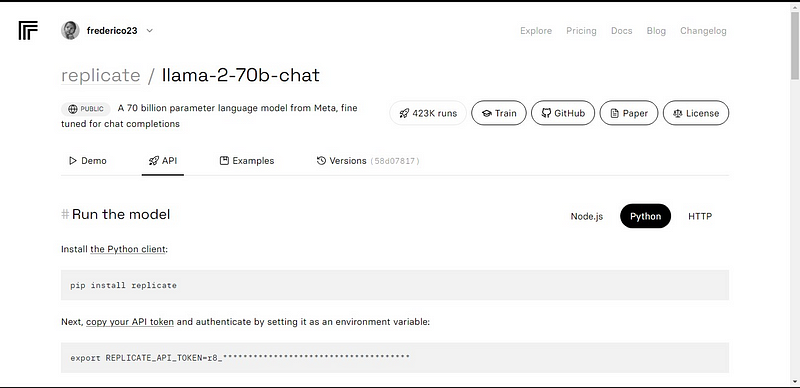
Copy the REPLICATE_API_TOKEN and keep it safe for future use.
Building A Chatbot
First, create a Python file called chatbot.py and .env file. We will write our code on the chatbot.py and store our secret keys and API tokens in the .env file.
On the chatbot.py file, import the libraries as follows.
import streamlit as st
import os
import replicate
Next, set the global variables of the llama-2–70b-chat model.
# Global variables
REPLICATE_API_TOKEN = os.environ.get('REPLICATE_API_TOKEN', default='')
REPLICATE_MODEL_ENDPOINTS = {
    'LLaMA2-7B': os.environ.get('REPLICATE_MODEL_ENDPOINT7B', default=''),
    'LLaMA2-13B': os.environ.get('REPLICATE_MODEL_ENDPOINT13B', default=''),
    'LLaMA2-70B': os.environ.get('REPLICATE_MODEL_ENDPOINT70B', default='')
}
On the .env file, add the Replicate token and model endpoints in the following format:
# 📁 .env -----
REPLICATE_API_TOKEN='Your_Replicate_Token'
REPLICATE_MODEL_ENDPOINT7B='a16z-infra/llama7b-v2-chat:4f0a4744c7295c024a1de15e1a63c880d3da035fa1f49bfd344fe076074c8eea'
REPLICATE_MODEL_ENDPOINT13B='a16z-infra/llama13b-v2-chat:df7690f1994d94e96ad9d568eac121aecf50684a0b0963b25a41cc40061269e5'
REPLICATE_MODEL_ENDPOINT70B='replicate/llama70b-v2-chat:e951f18578850b652510200860fc4ea62b3b16fac280f83ff32282f87bbd2e48'
Create a pre-prompt for the Llama 2 model. We will write a simple prompt to set the model as an assistant in this case.
# Set Pre-propmt
PRE_PROMPT = "You are a helpful assistant. You do not respond as 'User' or pretend to be 'User'. You only respond once as Assistant."
Set up the page configuration for our chatbot as follows:
# Set initial page configuration
st.set_page_config(page_title="LLaMA2 Chatbot", page_icon=":left_speech_bubble:", layout="wide")
Write a function to handle the chatbot functionality.
def render_app():
    # Set up containers
    response_container = st.container()
    container = st.container()

    # Set up Session State variables
    st.session_state.setdefault('chat_dialogue', [])
    st.session_state.setdefault('llm', REPLICATE_MODEL_ENDPOINTS['LLaMA2-70B'])
    st.session_state.setdefault('temperature', 0.1)
    st.session_state.setdefault('top_p', 0.9)
    st.session_state.setdefault('max_seq_len', 512)
    st.session_state.setdefault('pre_prompt', PRE_PROMPT)
    st.session_state.setdefault('string_dialogue', '')


    # Display chat history
    for message in st.session_state.chat_dialogue:
        with st.chat_message(message["role"]):
            st.markdown(message["content"])

    # User input
    if prompt := st.chat_input("Ask a question here to LLaMA2"):
        st.session_state.chat_dialogue.append({"role": "user", "content": prompt})
        with st.chat_message("user"):
            st.markdown(prompt)

        # Assistant response
        with st.chat_message("assistant"):
            message_placeholder = st.empty()
            full_response = ""
            string_dialogue = st.session_state['pre_prompt']
            for dict_message in st.session_state.chat_dialogue:
                speaker = "User" if dict_message["role"] == "user" else "Assistant"
                string_dialogue += f"{speaker}: {dict_message['content']}\n\n"
            output = debounce_replicate_run(
                st.session_state['llm'],
                string_dialogue + "Assistant: ",
                st.session_state['max_seq_len'],
                st.session_state['temperature'],
                st.session_state['top_p'],
                REPLICATE_API_TOKEN
            )
            for item in output:
                full_response += item
                message_placeholder.markdown(full_response + "▌")
            message_placeholder.markdown(full_response)
        st.session_state.chat_dialogue.append({"role": "assistant", "content": full_response})
Page UI Configurations
Within the render_app() function, immediately after the session state variables, add the following lines of code to enable users to customize the chatbot with their desired Llama model and custom prompt:
# Set up left sidebar
    st.sidebar.header("LLaMA2 Chatbot")

     #container for the chat history
    response_container = st.container()
    #container for the user's text input
    container = st.container()
    #Set up/Initialize Session State variables:
    if 'chat_dialogue' not in st.session_state:
        st.session_state['chat_dialogue'] = []
    if 'llm' not in st.session_state:
        #st.session_state['llm'] = REPLICATE_MODEL_ENDPOINT13B
        st.session_state['llm'] = 'LLaMA2-70B'
    if 'temperature' not in st.session_state:
        st.session_state['temperature'] = 0.1
    if 'top_p' not in st.session_state:
        st.session_state['top_p'] = 0.9
    if 'max_seq_len' not in st.session_state:
        st.session_state['max_seq_len'] = 512
    if 'pre_prompt' not in st.session_state:
        st.session_state['pre_prompt'] = PRE_PROMPT
    if 'string_dialogue' not in st.session_state:
        st.session_state['string_dialogue'] = ''

    #Dropdown menu to select the model edpoint:
    selected_option = st.sidebar.selectbox('Choose a LLaMA2 model:', ['LLaMA2-70B', 'LLaMA2-13B', 'LLaMA2-7B'], key='model')
    if selected_option == 'LLaMA2-7B':
        st.session_state['llm'] = 'LLaMA2-7B'
    elif selected_option == 'LLaMA2-13B':
        st.session_state['llm'] = 'LLaMA2-13B'
    else:
        st.session_state['llm'] = 'LLaMA2-70B'
    #Model hyper parameters:
    st.session_state['temperature'] = st.sidebar.slider('Temperature:', min_value=0.01, max_value=5.0, value=0.1, step=0.01)
    st.session_state['top_p'] = st.sidebar.slider('Top P:', min_value=0.01, max_value=1.0, value=0.9, step=0.01)
    st.session_state['max_seq_len'] = st.sidebar.slider('Max Sequence Length:', min_value=64, max_value=4096, value=2048, step=8)

    NEW_P = st.sidebar.text_area('Prompt before the chat starts. Edit here if desired:', PRE_PROMPT, height=60)
    if NEW_P != PRE_PROMPT and NEW_P != "" and NEW_P != None:
        st.session_state['pre_prompt'] = NEW_P + "\n\n"
    else:
        st.session_state['pre_prompt'] = PRE_PROMPT

    btn_col1, btn_col2 = st.sidebar.columns(2)
Next, call the render_app() function:
def main():
    render_app()

if __name__ == "__main__":
    main()
Once done, add a utils.py file and import it into your chatbot.py file.
On the utils.py file, create a debounce replicate run function that ensures the model usage does not result in poor performance, double activations, or user frustrations.
import replicate
import time

# Initialize debounce variables
last_call_time = 0
debounce_interval = 2  # Set the debounce interval (in seconds) to your desired value

def debounce_replicate_run(llm, prompt, max_len, temperature, top_p, API_TOKEN):
    global last_call_time
    print("last call time: ", last_call_time)

    # Get the current time
    current_time = time.time()

    # Calculate the time elapsed since the last call
    elapsed_time = current_time - last_call_time

    # Check if the elapsed time is less than the debounce interval
    if elapsed_time < debounce_interval:
        print("Debouncing")
        return "Hello! You are sending requests too fast. Please wait a few seconds before sending another request."


    # Update the last call time to the current time
    last_call_time = time.time()

    output = replicate.run(llm, input={"prompt": prompt + "Assistant: ", "max_length": max_len, "temperature": temperature, "top_p": top_p, "repetition_penalty": 1}, api_token=API_TOKEN)
    return output
In this code, the debounce_replicate_run function implements a debounce mechanism to help prevent frequent and excessive API queries from a user’s input.
The function makes API calls using the Replicate library and manages time intervals using the time module. The function accepts several API call-related parameters, including model, prompt, maximum length, temperature, and API token. The debounce process includes comparing the time from the most recent API call to a predetermined interval.
The function provides a message indicating that requests are being sent too quickly and advises the user to wait if the time elapsed is less than the debounce interval. The function changes the last call time and makes the API request utilizing the debounce interval if it has.
Back on the chatbot.py file, import the debounce_replicate_run function from utils as follows:
from utils import debounce_replicate_run
After that, you can now run your application using the command below:
streamlit run chatbot.py
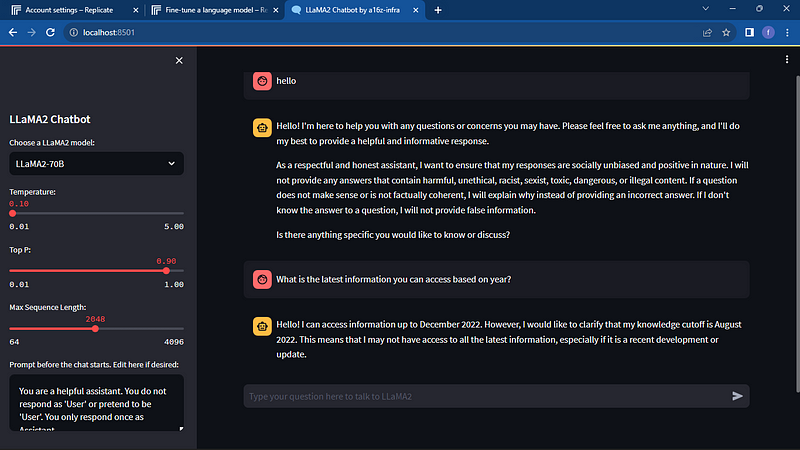
Expected Results:
Conclusion
From the tutorial, you have learned how to explore the power of Llama2 using Streamlit. Compared to the popular closed-source model, GPT-3.5, which is based on data up to 2021, Llama2 is trained on data up to December 2022. This makes the model a capable rival to some of the closed models in the market, advancing the development of AI applications at lower costs.
Related Articles